Rags to Rugs is an ebook and a series on the Day to Day Adventures blog. If you would like to check out all the posts in the series(or get the ebook) then go to the main Rags to Rugs page to see the other 8 posts. This is #5 in the series so go check out Reasons to Make a Rag Rug plus the next 3 posts in the series and then come on back. I'll be here waiting to show you how to make the base for a rag rug.
Warnings about making the base of an oval rag rug
This is the most awkward stage of your rug. Since you don’t know what the process is supposed to look like. I have tried to take clear pictures and really show you what each step looks like. I am in the process of shooting some videos that will help you even more to SEE how a rag rug goes together.
Doesn't that sound amazing?
Would you like access to these videos?
As soon as they are available I would love to let you know! It's easy just click to sign up for the Rags to Rugs instruction videos! *edit* NOW available!
Need a wooden needle? Get yours on the Rag Rug Resource page!
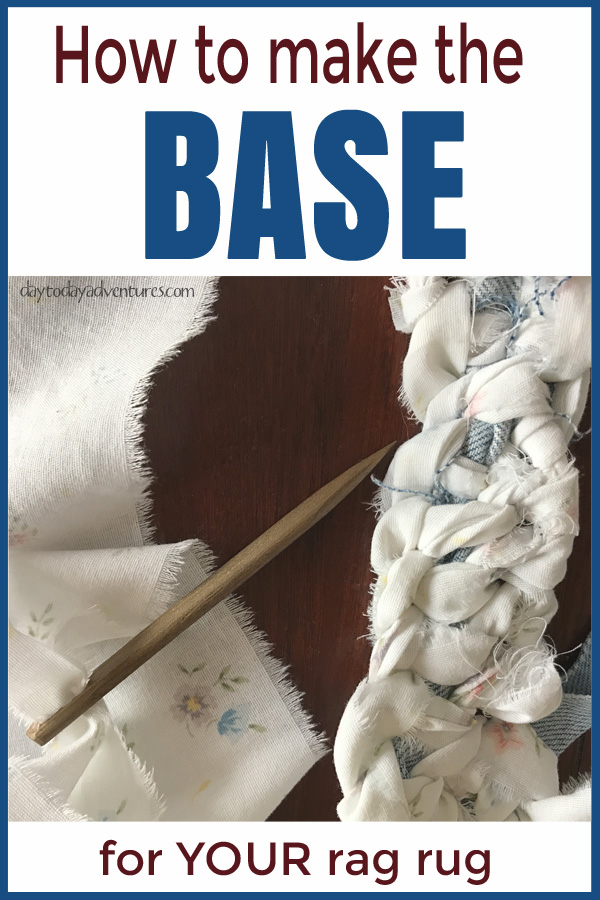
Steps for starting a base for an oval rug
1. Place your safety pin in the knot of two joined strips of fabric (here is how to join fabric without sewing) and anchor it. The first time I did this I used my son’s math book because it was heavy enough that I could put tension on it and it wouldn’t move. For other rugs I've pinned it to a large pillow that I held on my lap. But pinning it to other fabric strips works too as you can see in the pictures!
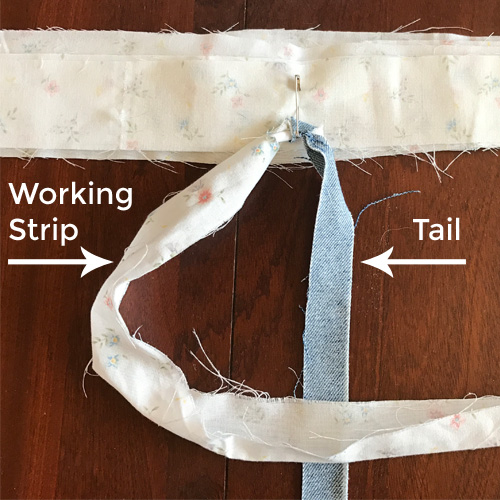
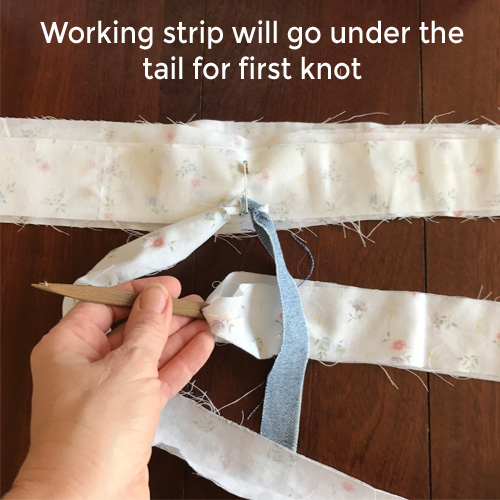
2. Make a number four with the two strips. I will call the strip on the left the WORKING STRIP and the one on the right the TAIL. The tail gets to just stay still while the working strip creates the loops and knots of the rug.
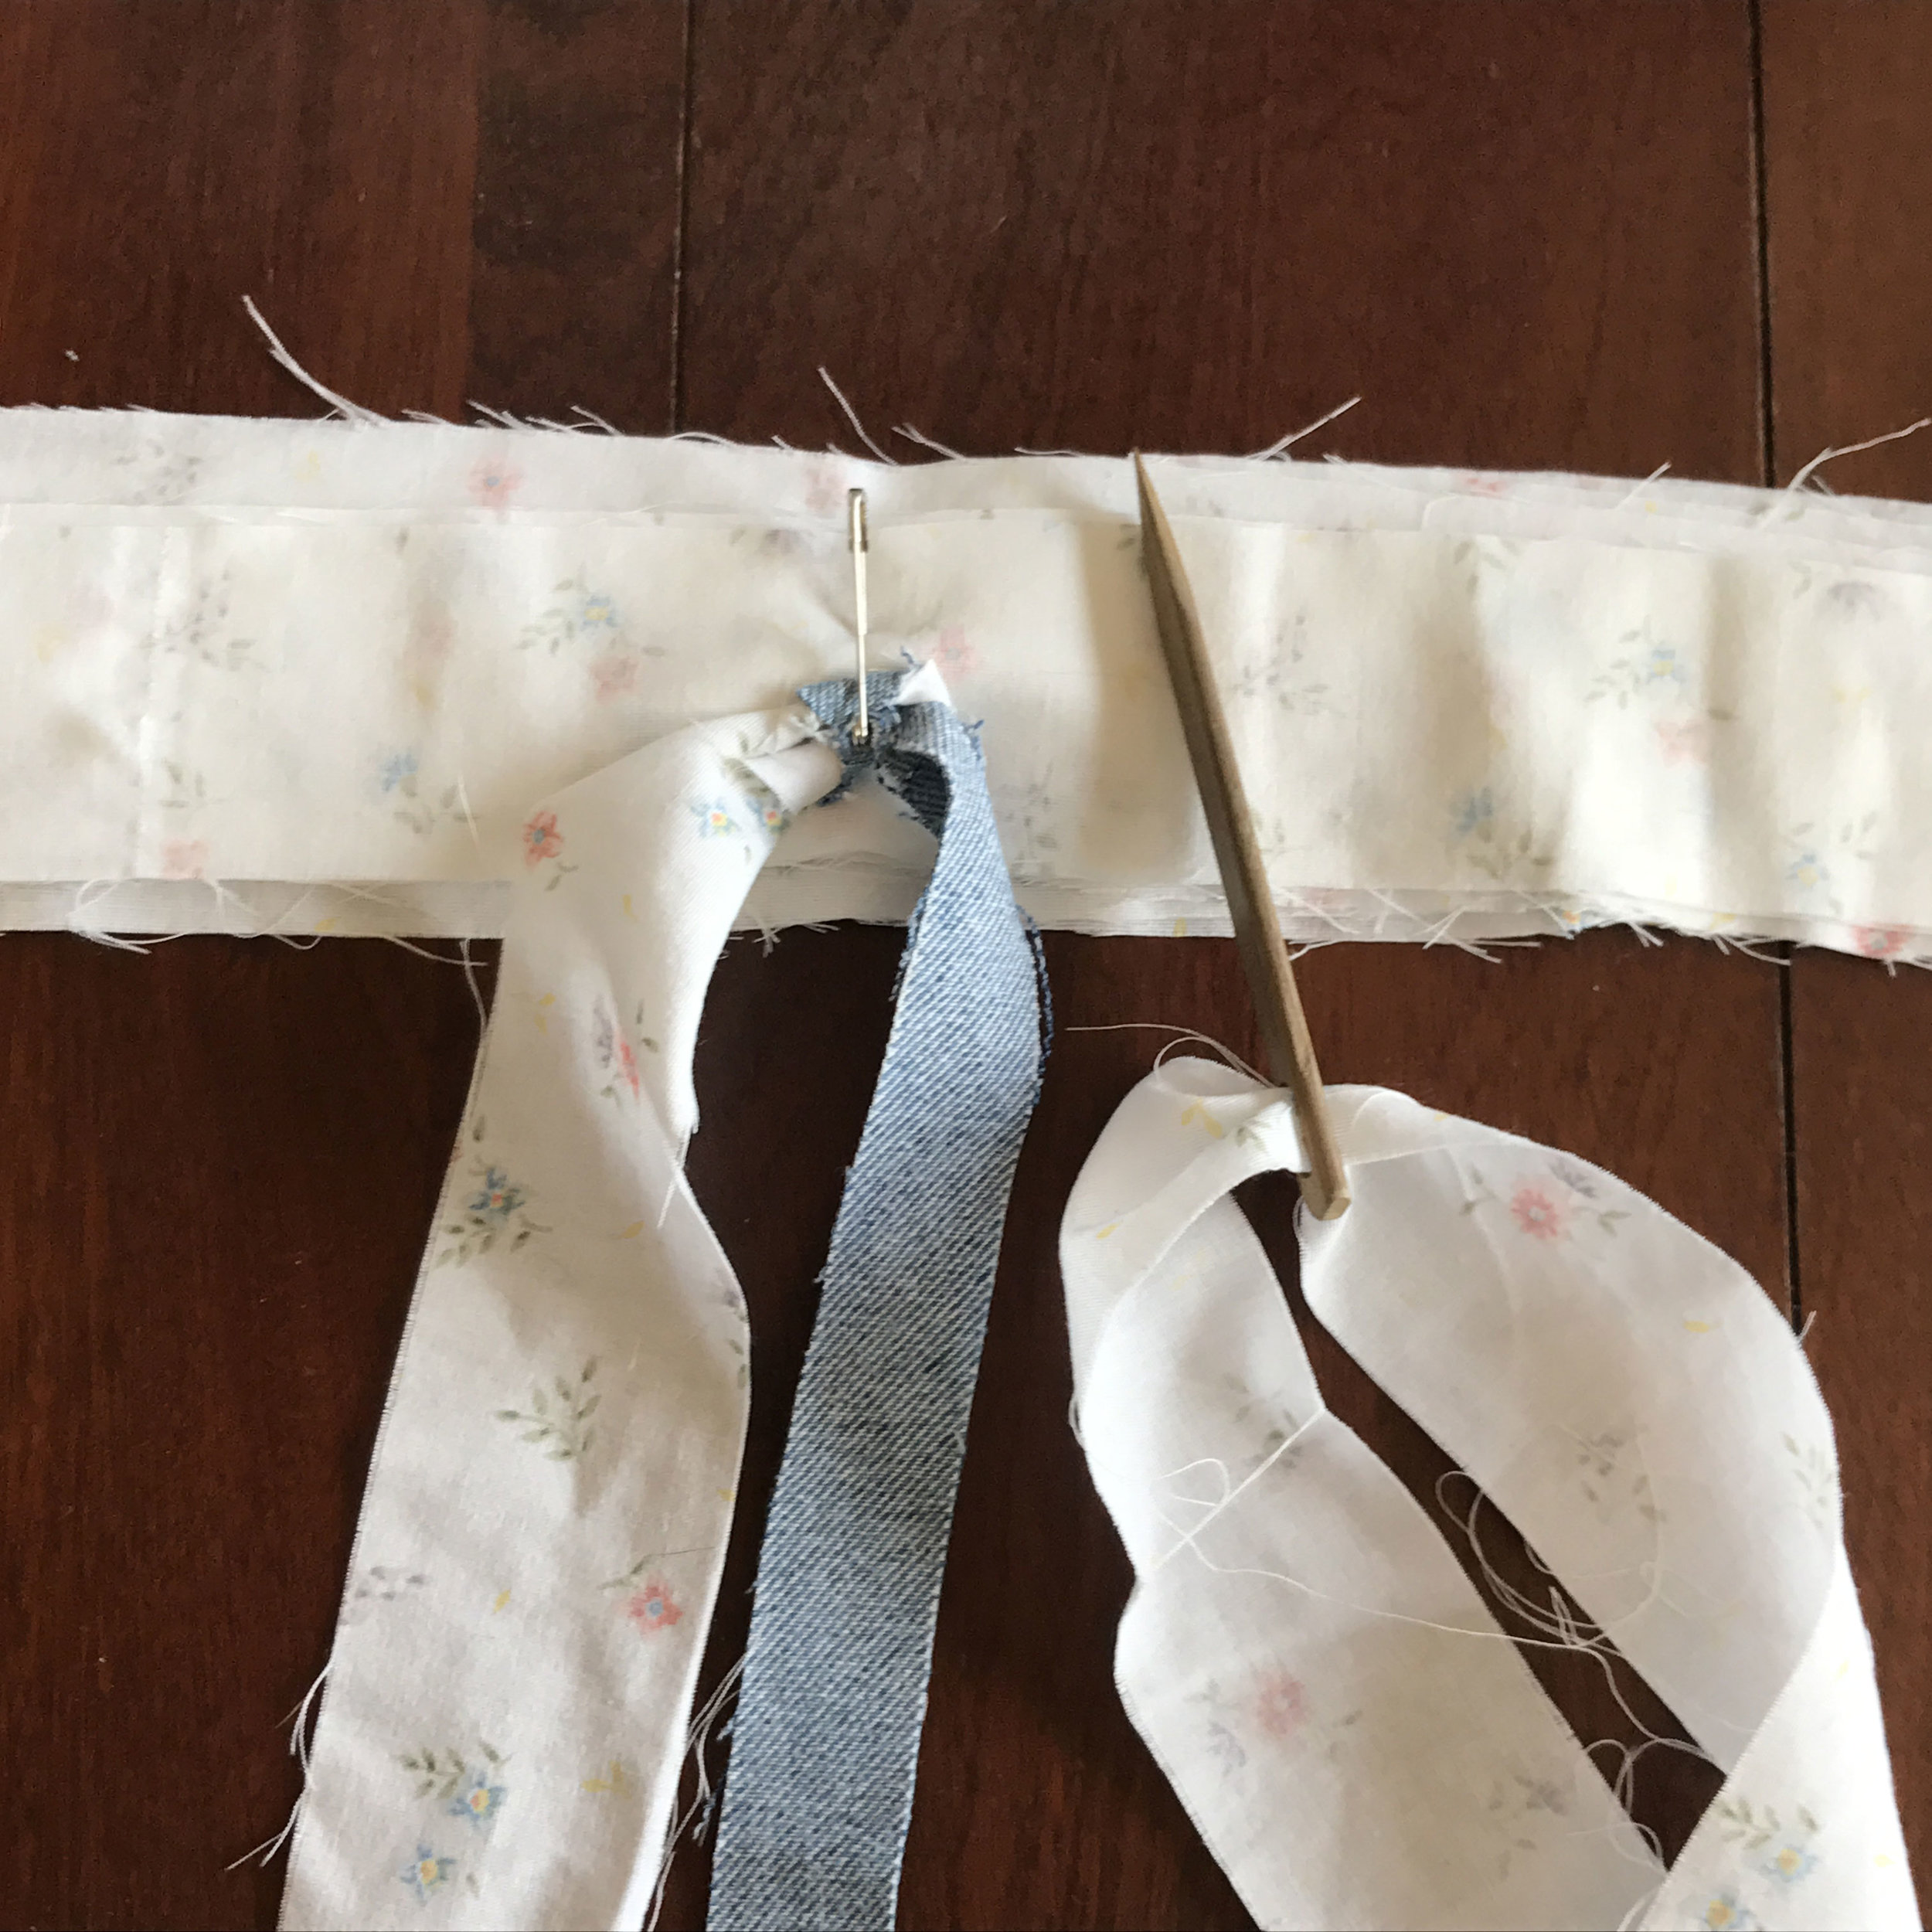
3. Thread your needle on the WORKING STRIP and bring it under the tail.
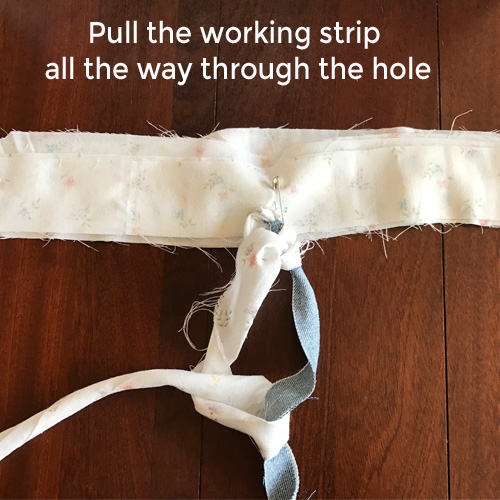
4. Pull the WORKING STRIP until the stitch you are creating is pretty small. Don’t pull it too tight. It helps on the base for you to have some wiggle room on your stitches so you can easily see them when you do the next row.
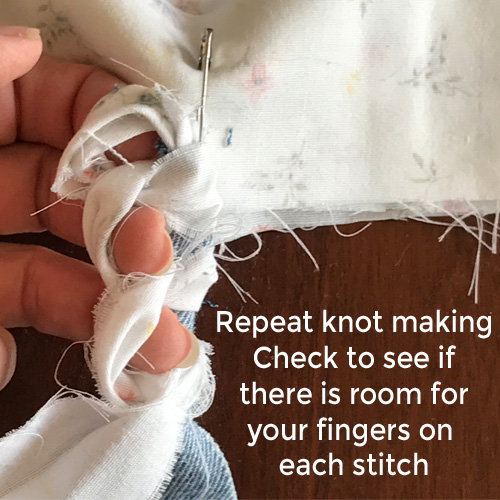
5. Make another number four shape with the WORKING STRIP and the TAIL.
6. Then pull the WORKING STRIP through the hole again.
7. Repeat this process over and over to create the base for your rug. The longer the base that you make the longer your rug will be.
Helpful Hints for making the base for a oval rag rug
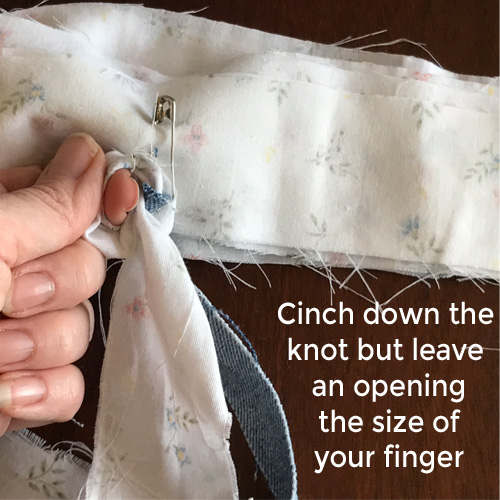
There needs to be a hole in the stitch that you just made because later you will be working in that space.
Small tight stitches are not better but you also do not want it to be huge. Can you slide the needle easily in the holes? If not go bigger. If you could fit several needles then go smaller.
Want all the steps to make a rag rug NOW? You can get an ad-free, printable .pdf for easy to follow instructions that you can take with you anywhere for just $7.50.
If you purchase the ebook, then you are getting more detailed explanations than the blog posts but if you want to make rugs for free then just be sure to visit each post!
A printed copy means you don't need to be on the internet to follow the directions.
Related Posts you won't want to miss!